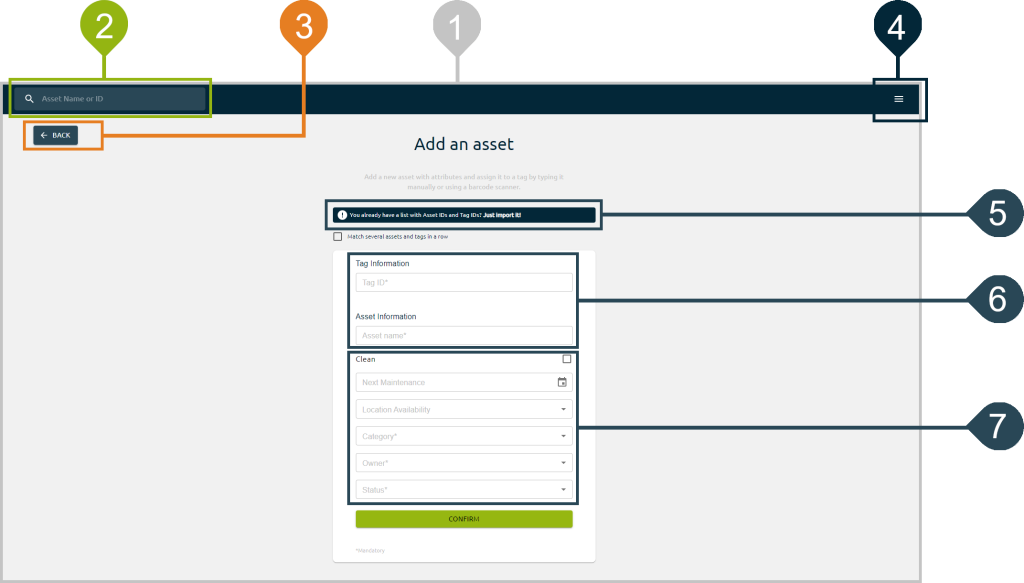
| 1 | Main view | Form page for adding a new asset and assign it to a trackable device (tag). |
|---|---|---|
| 2 | Search bar | Search by asset name or by tag ID. |
| 3 | Back button | Click this button to return to the list of your assets. |
| 4 | Menu | From here, you can select a location, choose a language, or log out. |
| 5 | Batch import | If you already have a list of assets and tag IDs, you can add them all at once by clicking this link. |
| 6 | Standard form fields | Fill out these fields to add a new asset. Click the checkbox above the form fields to add multiple assets in a row. Note that the asset name and tag ID are required. |
| 7 | Custom form fields | In addition to the default fields/asset attributes, it is possible to append custom attributes to the assets. As it’s name implies, a custom attribute can be customized by the customer. It is defined and set up when deploying the tracking project. Depending on their definition, they can be single choice, multiple choice, boolean, text or date options and can be mandatory or not. See the corresponding documentation for more information about the custom attributes. |